O365 | Flow - Send news from Sharepoint via email
 Micke Kring
·
·
8 min read
Micke Kring
·
·
8 min read

If your organization uses Office365 together with SharePoint for, among other things, news, you might want the ability to send your news out by email? This could be SharePoint sites for, for example, class pages or staff pages where you simply want to allow users to subscribe to those news posts. Simply put, Flow is a service (and part of O365) where you can create automated flows between different apps based on something happening. And when something happens, something should be done. The example flow I create here is based on: when a news post is published in SharePoint, the news (with content) is sent by email via Outlook.
Flow | SharePoint news to email
In this example we want an email to be sent (to the recipients I choose) when a news post is published in SharePoint. In my case we have a lot of different SharePoint sites at the school and I want an email with the content when a news post is published in our staff room. It could just as well have been weekly letters from classrooms that you want to send to guardians or students so they don’t have to log in to see non-sensitive information. In the video below you can see how it will work when it’s finished.
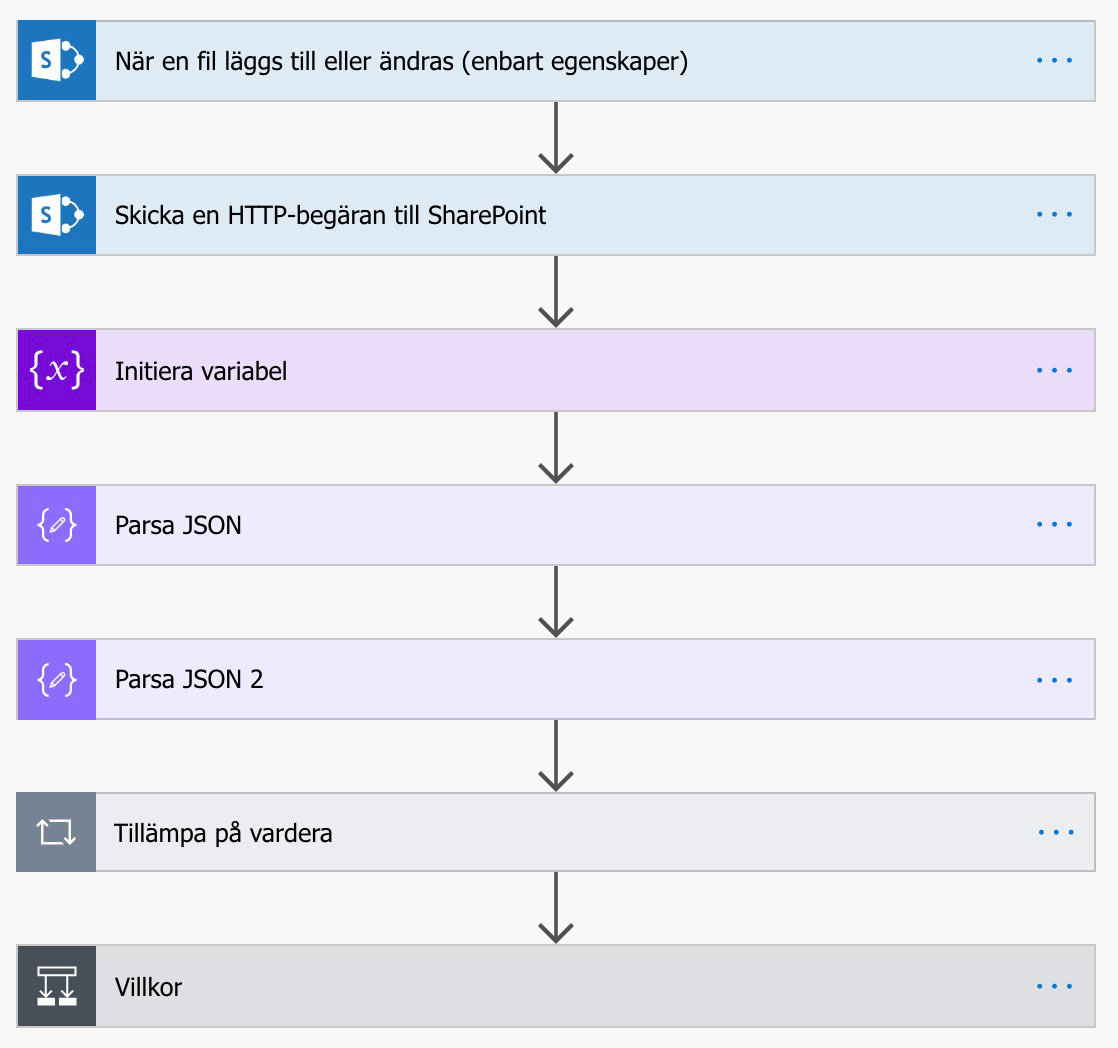
When you’re done with your flow it will look like the image below.
1. Sign in
Start by going to flow.microsoft.com and sign in with your account.
2. My flows

Start by clicking My flows. Here all the flows you’ve created are listed. This will likely be empty for you if you haven’t already created flows.
3. Create a flow
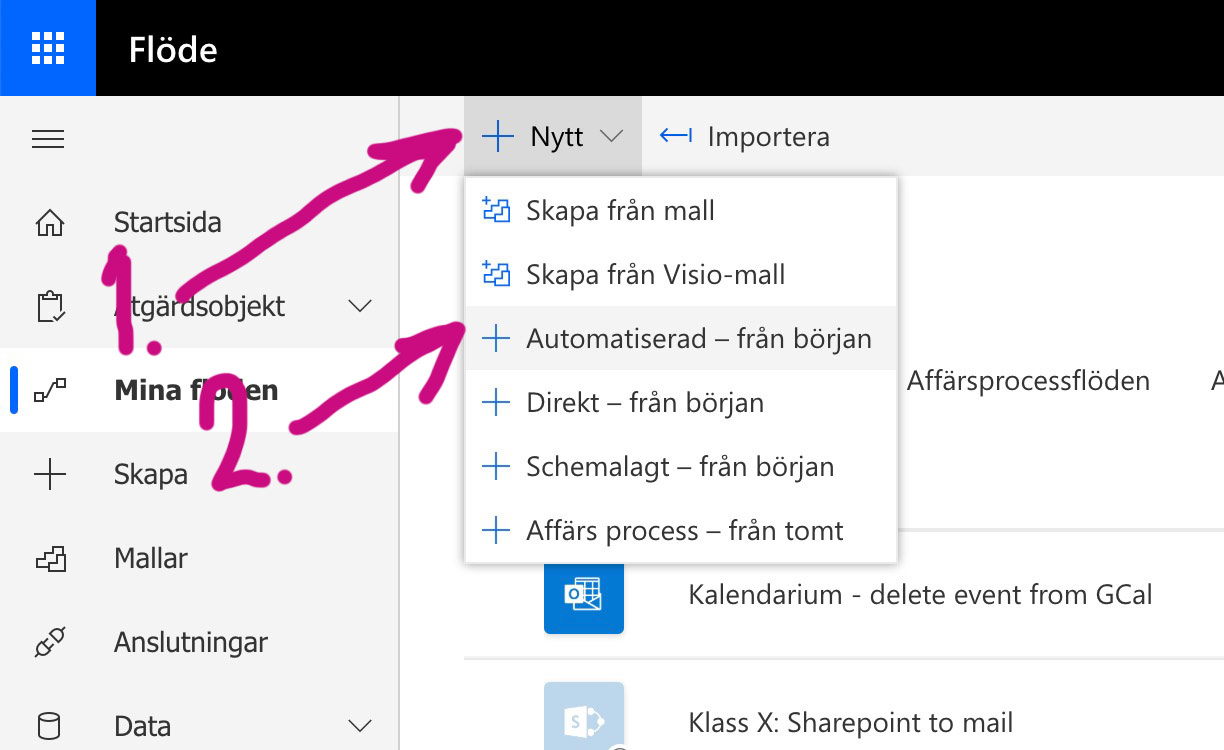
Now it’s time to create our first flow and the first thing we’ll do is (1) create a New one and choose (2) Automated — from blank.
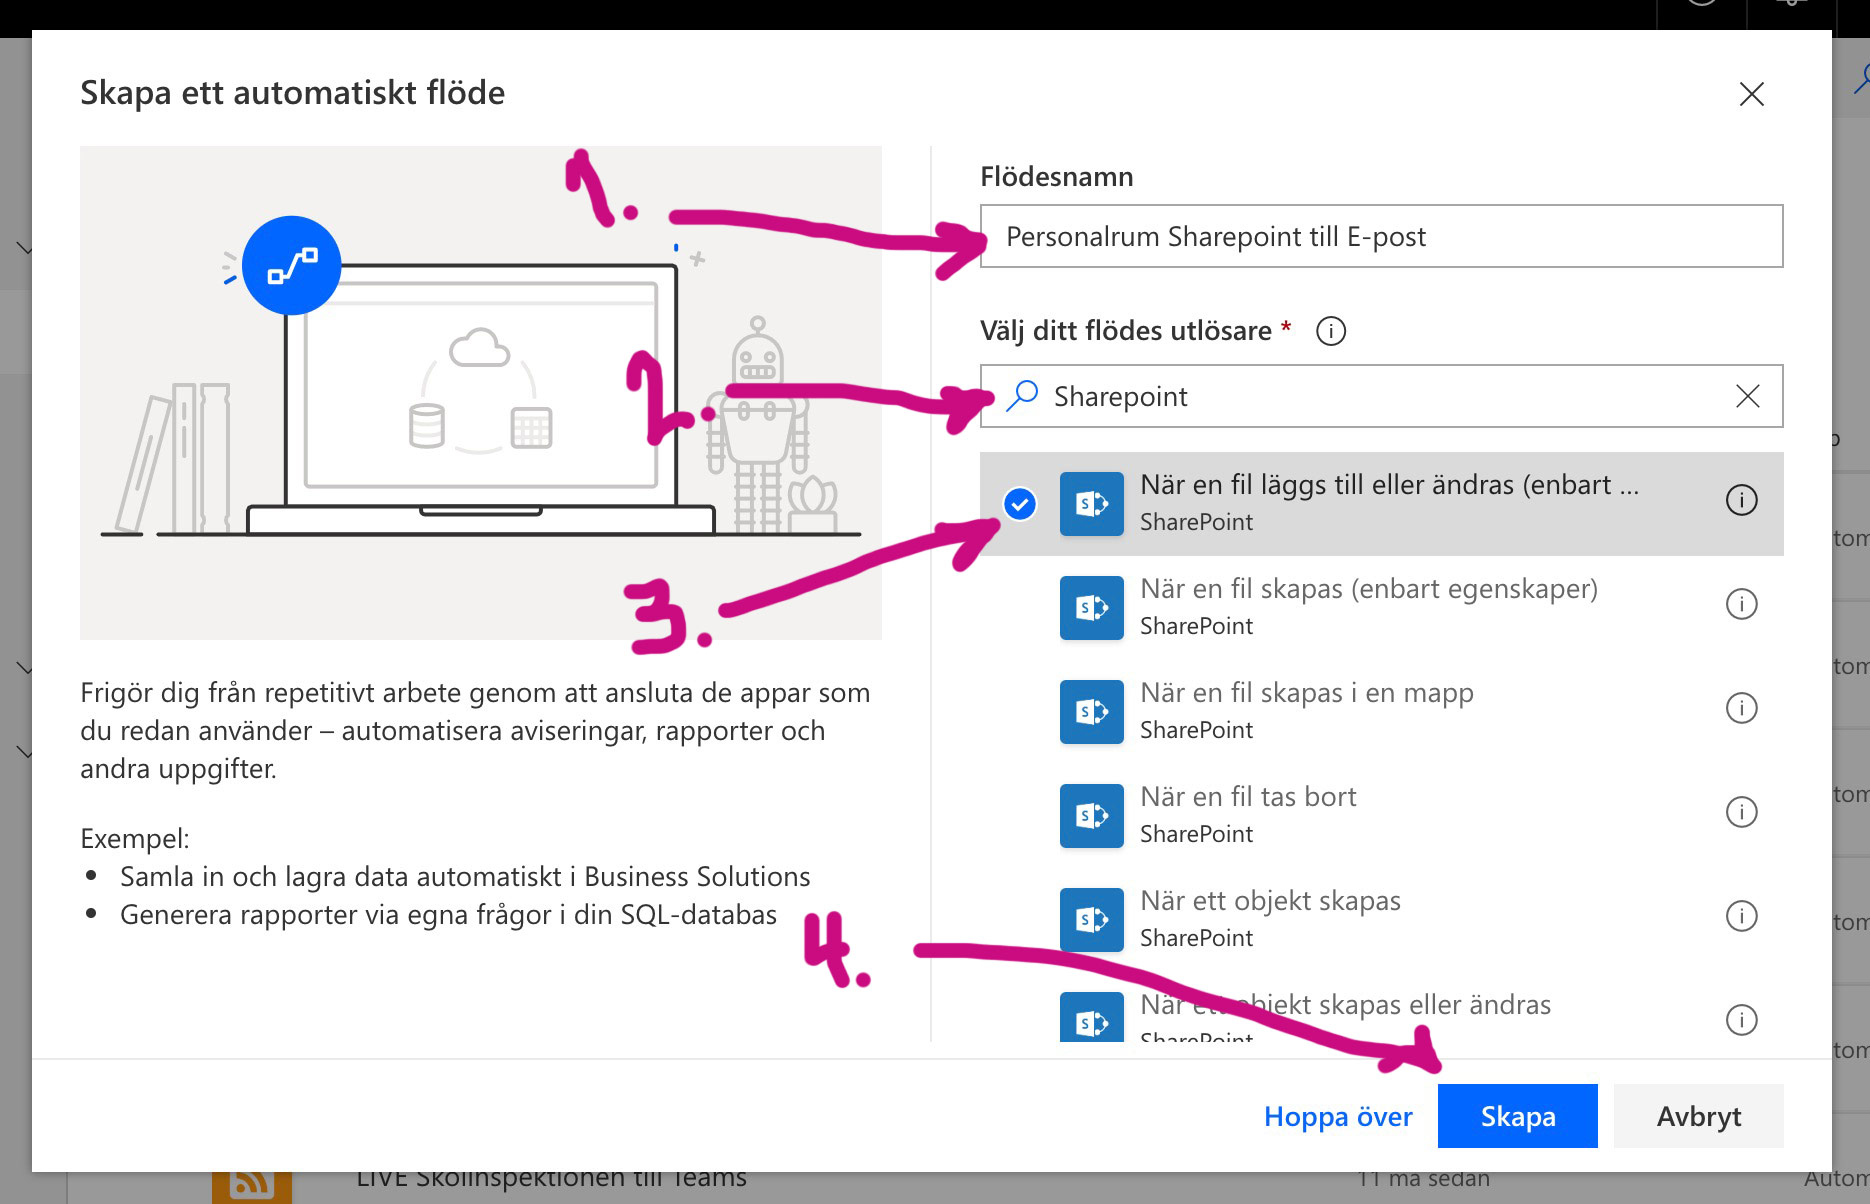
You’ll now see the window for creating the flow and we start by (1) naming our flow under Flow name to anything, but preferably something that describes what the flow does.
I name mine Personalrum Sharepoint till e-post. Next we’ll (2) Choose your flow’s trigger — that is, what must happen for the flow to run. In our case we want the flow to run when a news post is created in SharePoint, so I type SharePoint in the search box. Now all triggers related to SharePoint appear and we choose (3) the one called When a file is created or modified (properties only). If you don’t see the full name you can hover the mouse pointer over the trigger to see the full name. NOTE! It’s important that you choose the correct trigger. When you’ve selected it (4) click Create.
4. The trigger
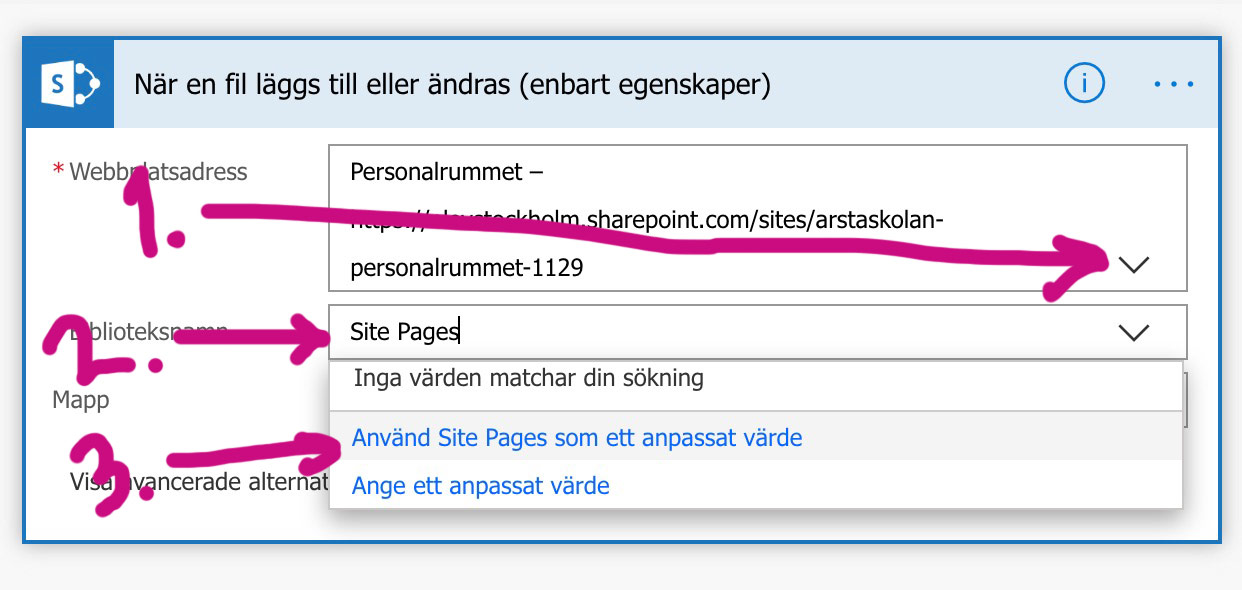
Now it’s time to work on our flow. You’ll see our trigger When a file is created or modified (properties only) and under (1) Site Address choose the SharePoint site you want to get the news from. In the picture you can see I chose Personalrummet. The list will show all the SharePoint sites you have access to. Under (2) Library Name type Site Pages (exactly as I did) and click (3) Use Site Pages as a custom value. When a news post is created in SharePoint, a file is created in a folder. That’s the folder we want to watch and the trigger will react when a new file is created.
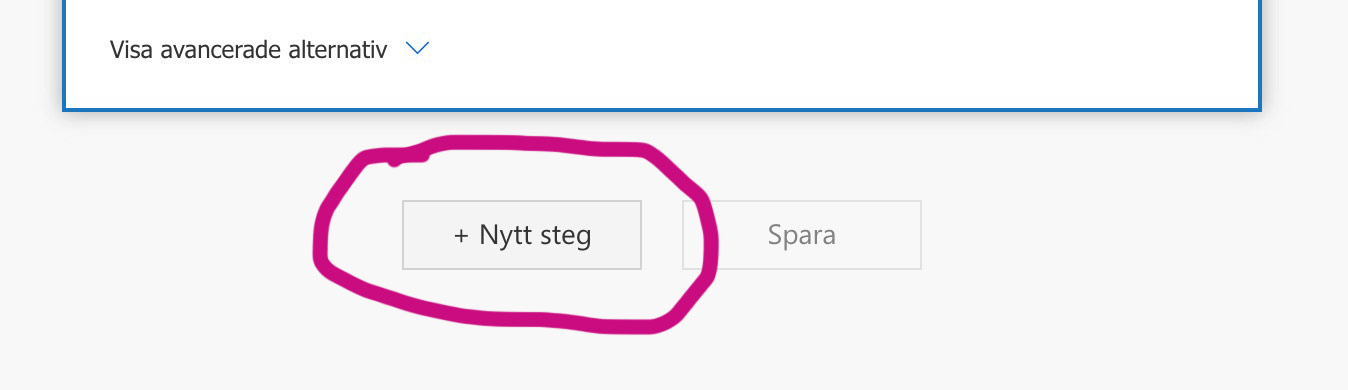 Now add a New step and continue.
5. HTTP request — Retrieve the file

Now that we have the trigger and the file properties, we also need to retrieve the file so we can extract its content and send it by email. Search among the SharePoint actions and add the one called Send an HTTP request to SharePoint. Choose (1) your site again (in my case Personalrummet). Then at (2) URI enter _api/sitepages/pages() manually and then place the cursor between the parentheses () and choose the ID block from the Dynamic content (you can see several arrows in the image with (2)). Finally, for Headers enter (3) Accept manually and (4) application/json;odata=nometadata manually.
6. Create a variable to store our text

Now add a new action and search for Variable. Then choose Initialize variable. What we do here is create (initialize) a variable that we (1) name NyhetsText. Then we set (2) the type for the variable to String.
7. Process JSON — file content — part 1

Now add a new action and add Parse JSON. It’s time to process the information in our news file. In Content (1) add Text from the Dynamic content and then you must paste a schema for the JSON manually in (2) Schema — see image below.
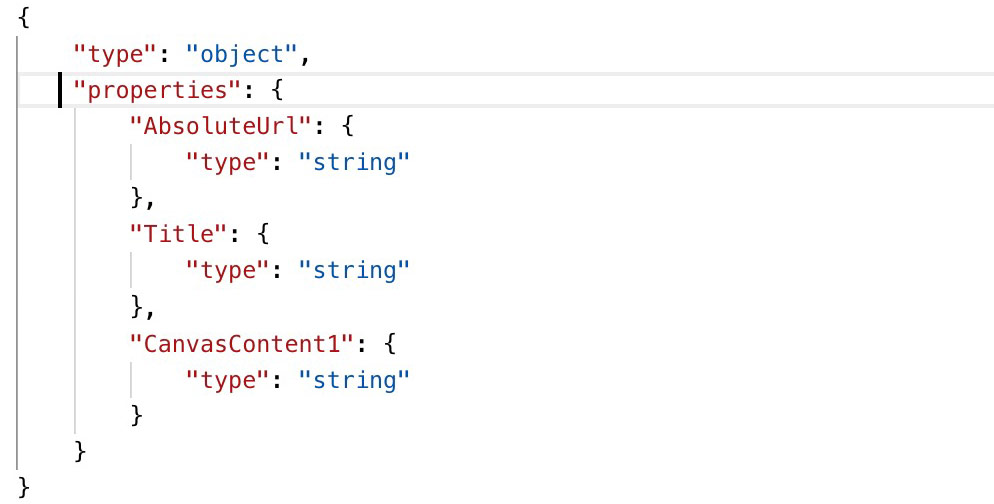
What we do with the schema (above) is that we want to extract a few things from the file and you can extract even more if you want. But the important one here is CanvasContent1, which is the full text of the post.
8. Process the content in CanvasContent1 — file content — part 2


Now add yet another new action and another Parse JSON, as we want to set up a schema for the content in CanvasContent1 and extract almost plain text. In (1) Content choose CanvasContent1 from the Dynamic content. Then manually paste the schema as shown in the image above. As you can see, it’s only innerHTML that we want to extract.
9. Add the content to our variable

Now it’s time to use a loop to add the innerHTML content to our NyhetsText variable that we created earlier in step 6. Start by creating a new action (1) Apply to each and inside it (2) create an action Append to string variable. In (3) Select output choose the Text block from the Dynamic content and then select (4) our variable NyhetsText and (5) the innerHTML block as the value.
10. Condition
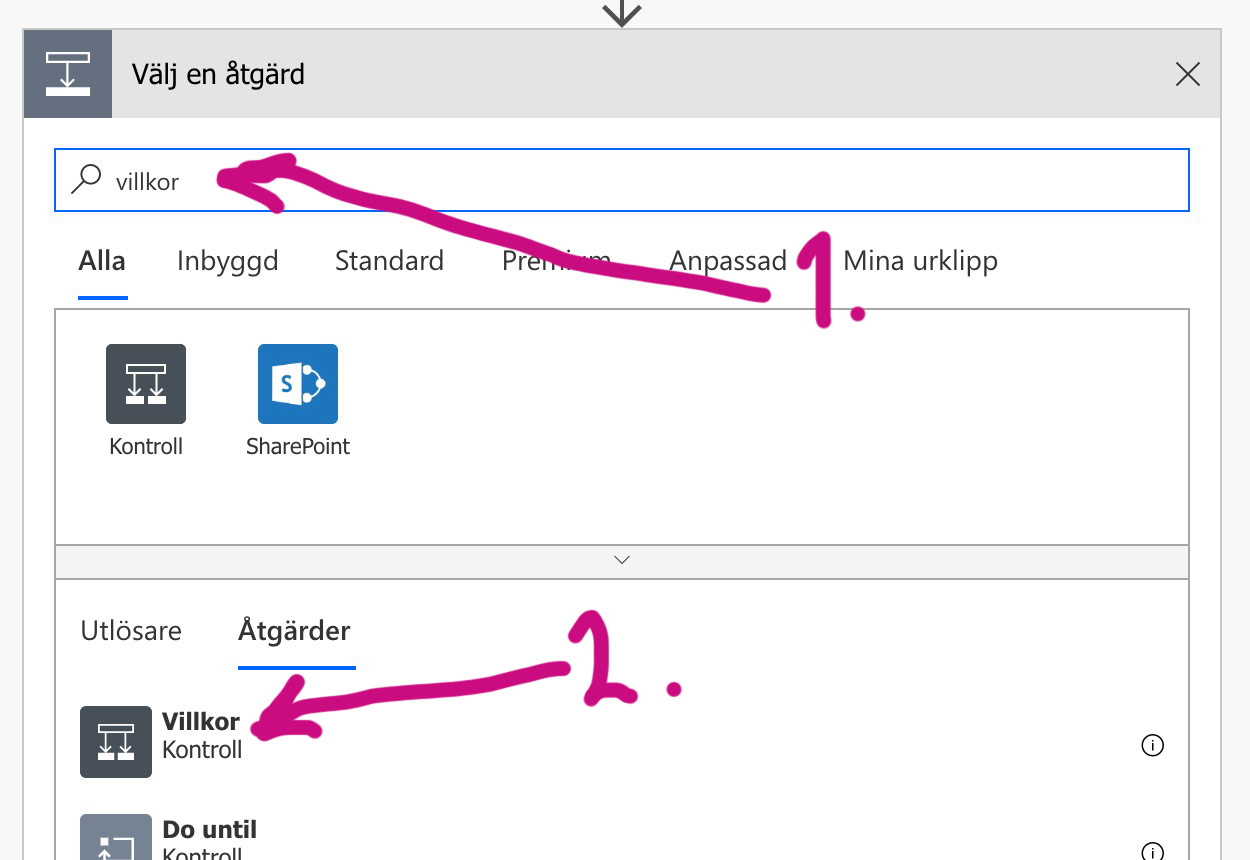
Now we’re getting close, but first we need to create a condition. Since a file is created when a news post is created in SharePoint, we want to be sure that what we send out is a published news post and not a draft. If you create a news post and save it as a draft because you want to work on it later, a file is still created. And we don’t want to send that out. Start by (1) searching for condition in the search box and then click (2) Condition.

We start by (1) Choosing a value for our condition. In (2) search box type promoted and choose (3) Promoted state.
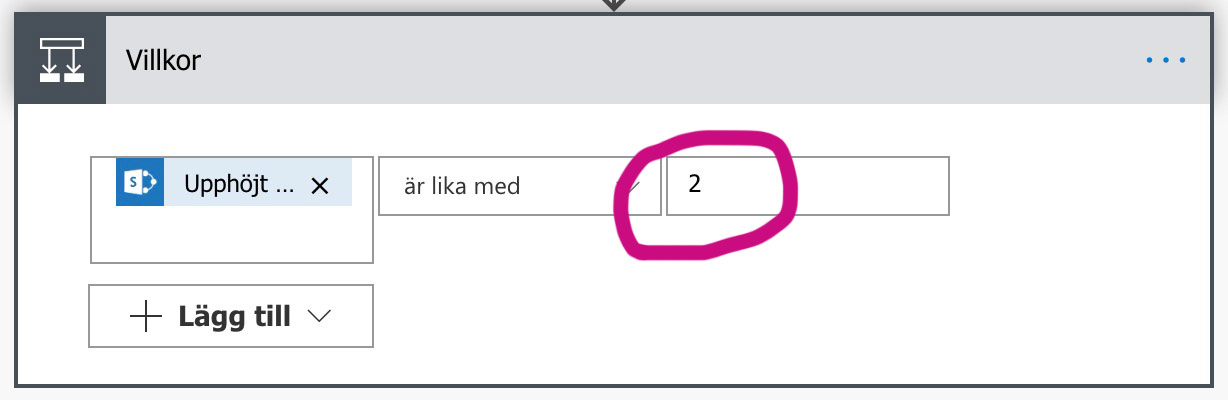
Now that we’ve chosen Promoted state, type 2, so that it looks like the image above. The value 2 means the news is published. So if a file is created in our SharePoint and it is published, something should happen.
11. Send email via Outlook

Now that our condition is met, we’ll Add an action under If yes. Click the button.
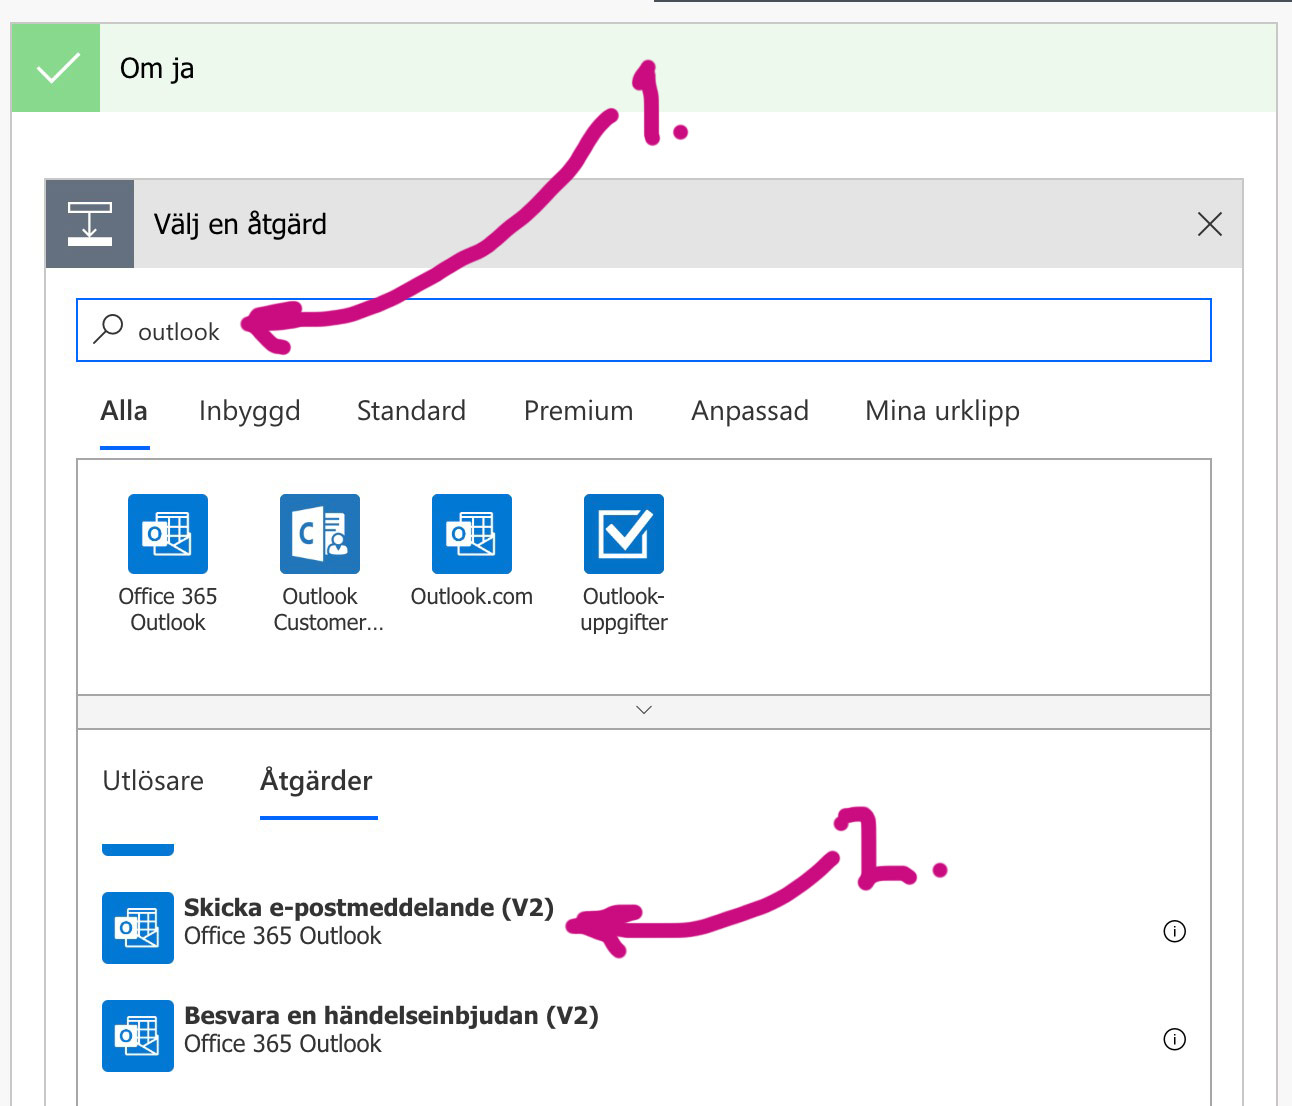
Because we want to send the news with Outlook, (1) type outlook in the action search box and scroll until you find (2) Send an email (V2) and click it.

Now we’ll format our email and choose what should be included. Start by (1) entering the email address to send To, in my case myself at micke.kring@edu.stockholm.se.
NOTE! If you want to send to multiple recipients, choose (4) Show advanced options and add those email addresses under Bcc, just like usual when you send email to multiple people and don’t want to reveal their addresses. Then create a (2) Subject and now you can use Title from Dynamic content. With a bit of HTML and Dynamic content you can compose your message in (3) body. Just copy how I did it. If you want, you can also change the email (5) priority.
12. Save and test
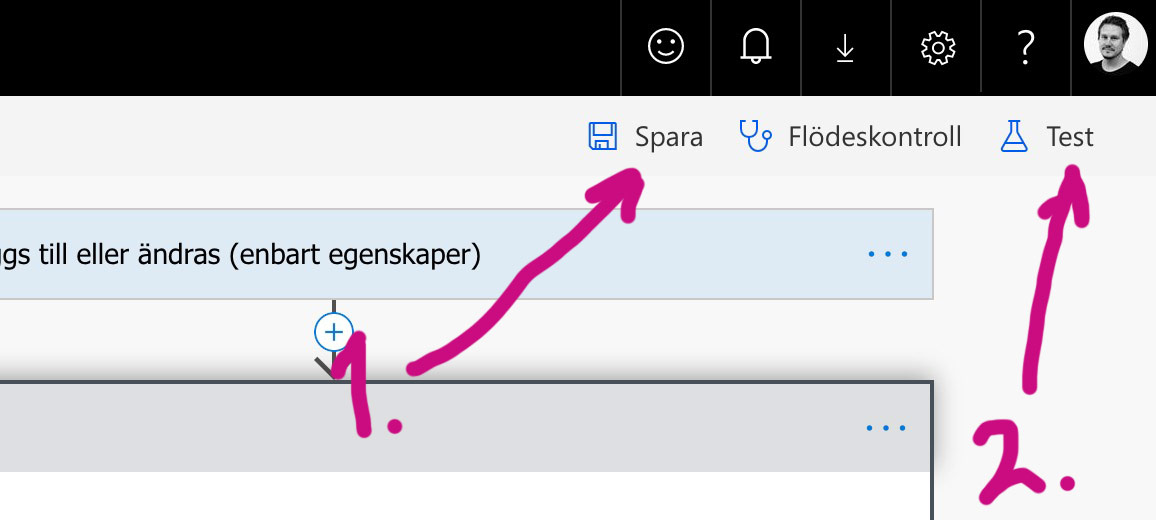
Now (1) Save your flow and then click (2) Test to see if it works.
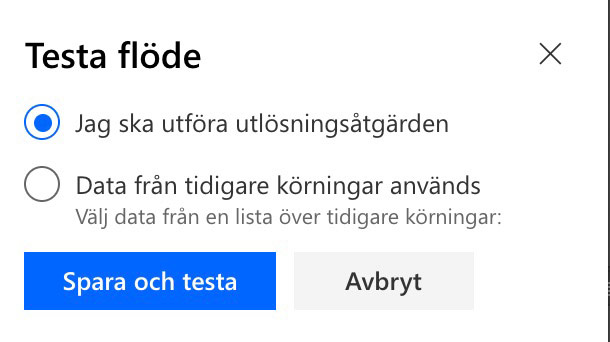
Choose I’ll perform the trigger action and click Save and test. Now you can go to your SharePoint site and publish a news post. Then go back to your flow page afterwards.

Hopefully it looks like this on your page — green checks after each step. If not — you’ll see where it stopped. Go back to this guide and make sure you’ve done everything as described here.
If you have any questions, just get in touch, either via the comments below or on social media. Good luck!